ResNet skip connections and Vision Transformer image-to-token conversion explained
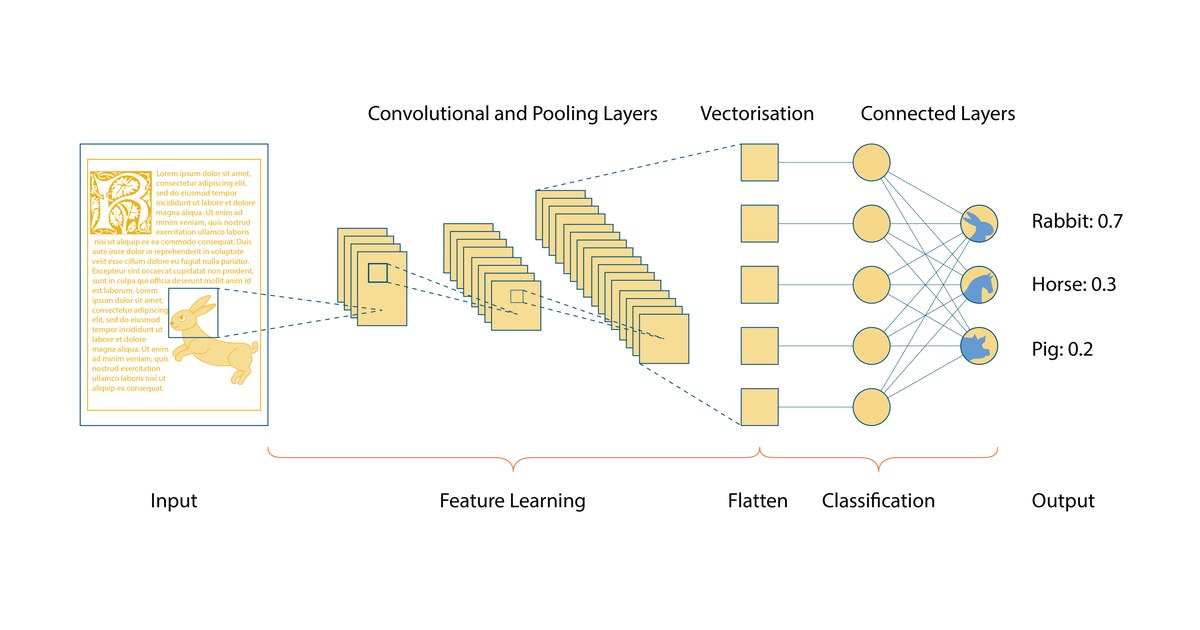
Illustrative image: A convolutional neural network: an input image passes through convolution and pooling layers to a classification output; illustrative of the deep learning approach AlexNet popularised. Image: Irisbox, CC BY 4.0, via Wikimedia Commons.
Let us look in simple terms at how two of the most important mathematical turning points in the history of deep learning work: the Skip Connections of ResNet and the Image-to-Token conversion of the Vision Transformer.
1. ResNet Skip Connections (the mathematics)
In ordinary neural networks, an input x passes through many layers and produces an output H(x). As the layers increase, the gradients shrink towards zero and training stalls (the Vanishing Gradient Problem).
ResNet changed this. Instead of making the layers learn H(x) directly, it makes them learn only the difference (the Residual) between the input and the output:
F(x) = H(x) − x
Rewriting this, the output y of a ResNet block becomes:
y = F(x, {Wᵢ}) + x
- x: the input.
- F(x, {Wᵢ}): the Residual Mapping learned by the convolution layers.
- + x: this is the Identity Skip Connection. It adds the input directly to the output without any change.
The magic of this in Backpropagation:
When the loss L is sent backwards during training, the gradient is calculated by the Chain Rule as follows:
∂L/∂x = ∂L/∂y · ∂y/∂x = ∂L/∂y · (∂F/∂x + 1)
- Why does the gradient not vanish? Because of the + 1 inside the brackets, even if the value of ∂F/∂x becomes very small, the error gradient ∂L/∂y flows directly and without obstruction to the early layers.
- When the dimensions change (Dimension Mismatch): If the dimensions (channels/size) of F(x) and x differ, x is passed through a linear transformation (Wₛx) before the addition: y = F(x) + Wₛx.
1. The ResNet Residual Block (PyTorch Code)
Note how the input x is added directly to the output (out + identity).
import torch
import torch.nn as nn

class ResidualBlock(nn.Module):
    def __init__(self, in_channels: int, out_channels: int, stride: int = 1):
        super().__init__()

        # முதன்மைப் பாதை: F(x)
        self.conv_block = nn.Sequential(
            nn.Conv2d(in_channels, out_channels, kernel_size=3, stride=stride, padding=1, bias=False),
            nn.BatchNorm2d(out_channels),
            nn.ReLU(inplace=True),

            nn.Conv2d(out_channels, out_channels, kernel_size=3, stride=1, padding=1, bias=False),
            nn.BatchNorm2d(out_channels)
        )

        # Skip Connection பாதை: x (அளவுகள் மாறினால் 1x1 Conv மூலம் சரிசெய்யப்படும்)
        self.shortcut = nn.Sequential()
        if stride != 1 or in_channels != out_channels:
            self.shortcut = nn.Sequential(
                nn.Conv2d(in_channels, out_channels, kernel_size=1, stride=stride, bias=False),
                nn.BatchNorm2d(out_channels)
            )

        self.relu = nn.ReLU(inplace=True)

    def forward(self, x: torch.Tensor) -> torch.Tensor:
        identity = self.shortcut(x)   # x (அல்லது Ws * x)
        out = self.conv_block(x)      # F(x)

        out = out + identity          # y = F(x) + x (முக்கியமான Skip Connection)
        return self.relu(out)

# --- இயக்கிப் பார்த்தல் ---
if __name__ == "__main__":
    x = torch.randn(4, 64, 56, 56)  # 4 படங்கள், 64 channels, 56x56 அளவு
    block = ResidualBlock(in_channels=64, out_channels=64, stride=1)
    y = block(x)
print(f"ResNet Input: {x.shape} -> Output: {y.shape}")- out = out + identity: this is the key bridge that lets the error gradients travel backwards without vanishing.
2. How does the Vision Transformer (ViT) turn images into tokens?
Transformer models can only understand a sequence of symbols (a 1D sequence). So ViT uses four steps to turn 2D images into 1D tokens.
Step 1: Splitting the image into pieces (Patching)
An image of size H × W × C (height × width × colour channels) is split into small square pieces (patches) of size P × P.
- For example, if a 224 × 224 × 3 image is split into 16 × 16 pieces:
N = (224 × 224) / (16 × 16) = 14 × 14 = 196 patches
Step 2: Flattening
Each 3D piece (16 × 16 × 3) is turned into one long single-row vector (a 1D vector):
16 × 16 × 3 = 768 numbers
Now we have data of size 196 × 768.
Step 3: Linear Projection / Patch Embedding
Each 768-length vector is multiplied by a learnable matrix E and converted to the fixed dimension of the model (D, usually 768):
zₚⁱ = xₚⁱ · E
(In practice, in PyTorch this is done very quickly with a single layer, nn.Conv2d(3, 768, kernel_size=16, stride=16).)
Step 4: Adding the [CLS] token and the Position Embedding
The Transformer does not know where in the image (top, bottom, middle) each piece came from. So two things are added:
- 1. [CLS] Token: To collect the overall meaning of the image, a special token (z_class) is added in front of the 196 pieces. The total number of tokens becomes 197.
- 2. Position Embeddings (E_pos): numbers that mark the position of each piece are added directly:
Z₀ = [z_class; zₚ¹; zₚ²; …; zₚ¹⁹⁶] + E_pos
This 197 × 768 matrix is what goes into the Transformer Encoder as input.
2. Vision Transformer (ViT) Patch Embedding (PyTorch Code)
The complete process of turning a 224 × 224 image into tokens of size 197 × 768:
import torch
import torch.nn as nn

class ViTPatchEmbedding(nn.Module):
    def __init__(self, img_size: int = 224, patch_size: int = 16, in_channels: int = 3, embed_dim: int = 768):
        super().__init__()
        self.num_patches = (img_size // patch_size) ** 2  # (224 / 16)^2 = 196 துண்டுகள்

        # Conv2d மூலம் படத்தை 16x16 துண்டுகளாகப் பிரித்து 768 பரிமாணத்திற்கு மாற்றுதல்
        self.proj = nn.Conv2d(in_channels, embed_dim, kernel_size=patch_size, stride=patch_size)

        # கற்றுக்கொள்ளக்கூடிய [CLS] டோக்கன் (1 x 1 x 768)
        self.cls_token = nn.Parameter(torch.zeros(1, 1, embed_dim))

        # கற்றுக்கொள்ளக்கூடிய நிலைக் குறியீடுகள் (1 x 197 x 768)
        self.pos_embed = nn.Parameter(torch.zeros(1, self.num_patches + 1, embed_dim))

    def forward(self, x: torch.Tensor) -> torch.Tensor:
        batch_size = x.shape[0]

        # 1. துண்டுகளாக்கி படமிடுதல்: (B, 3, 224, 224) -> (B, 768, 14, 14)
        x = self.proj(x)

        # 2. தட்டையாக்கி வரிசைப்படுத்துதல்: (B, 768, 14, 14) -> (B, 768, 196) -> (B, 196, 768)
        x = x.flatten(2).transpose(1, 2)

        # 3. ஒவ்வொரு படத்திற்கும் முன்னால் [CLS] டோக்கனைச் சேர்த்தல்: -> (B, 197, 768)
        cls_tokens = self.cls_token.expand(batch_size, -1, -1)
        x = torch.cat((cls_tokens, x), dim=1)

        # 4. நிலைக் குறியீட்டைக் கூட்டுதல் (Position Embedding)
        x = x + self.pos_embed
        return x

# --- இயக்கிப் பார்த்தல் ---
if __name__ == "__main__":
    img = torch.randn(4, 3, 224, 224)  # 4 RGB படங்கள் (224x224)
    vit_embed = ViTPatchEmbedding(img_size=224, patch_size=16, embed_dim=768)
    tokens = vit_embed(img)
print(f"ViT Image: {img.shape} -> Tokens: {tokens.shape}")- x.flatten(2).transpose(1, 2): this turns the 14 × 14 grid into 196 tokens in a row.
- torch.cat((cls_tokens, x), dim=1): this changes the total number of tokens from 196 to 197.
Quick comparison
| Feature | ResNet (Skip Connections) | Vision Transformer (Tokenization) |
|---|---|---|
| Basic unit | Pixels and local patterns (local grids) | 16×16 image patches |
| Mathematical operation | y = F(x) + x (additive shortcut) | Z₀ = [x_class; xₚE] + E_pos (matrix multiplication) |
| Spatial sense | Convolution knows position by design | Learns position through Position Embeddings |